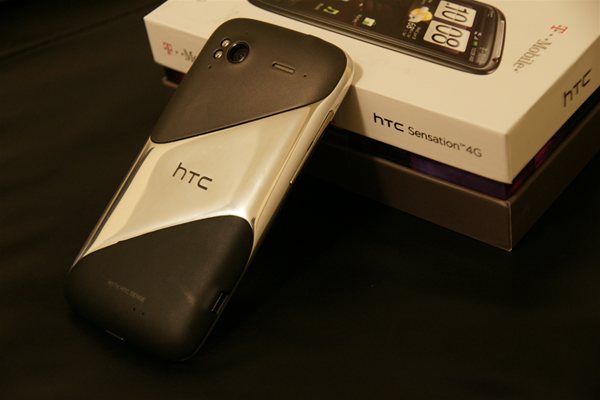
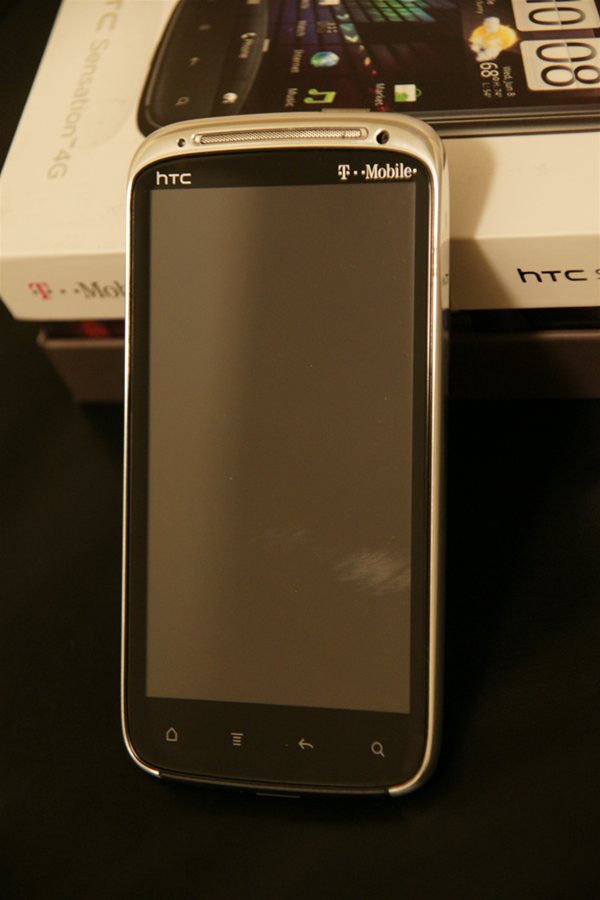
HTC Sensation 4G Chrome Polished Frame
Posted on Jul 24, 2011 by
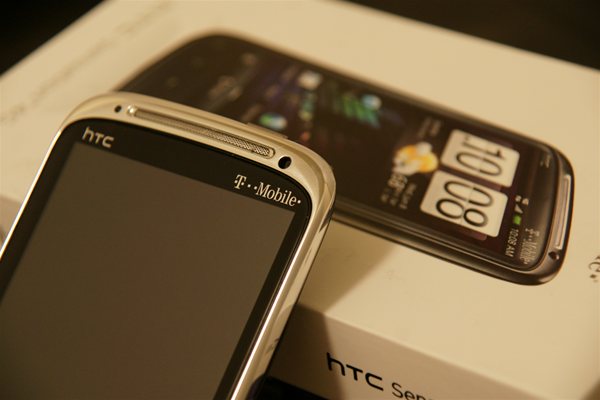
Paul WhiteWhen I used to have a an
HTC HD2 one of the things I did was polish my battery cover. As you can imagine the full aluminum frame of the
HTC Sensation 4G was one of the major reasons I got this phone. Finally I set aside a few hours to polish my Sensation 4G's frame. The results were stunning. I figured others may also want to do this. So I have written a tutorial on how to polish the frame of your
HTC Sensation 4G.
Questions and Answers section at bottom of page!How to Polish the frame of your HTC Sensation 4G
First before you decide to do this, be sure you have the supplies and the time. It took me about 6 hours to polish the frame from start to finish. This time could have been reduced by the use of power tools ( dremel tool / grinding wheel / polishing wheel ), but I for some stupid reason, decided to simulate the Amish, and perform this project with pride and care ( my finger tips and back still hurt ). So if you plan on doing it the way I did. You will need the following
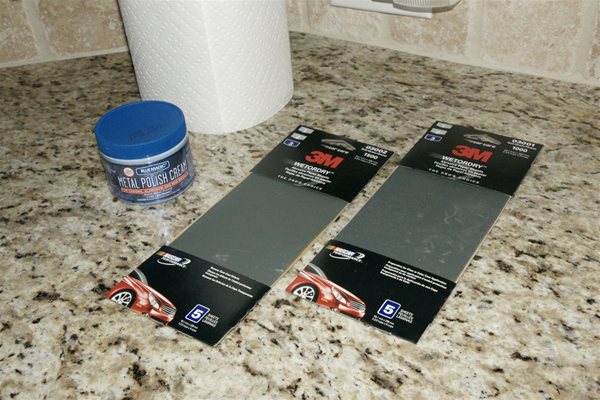
- 600 or 800 Grit Sand Paper ( optional )
- 1000 Grit Wet / Dry Sand Paper
- 1500 Grit Web / Dry Sand Paper
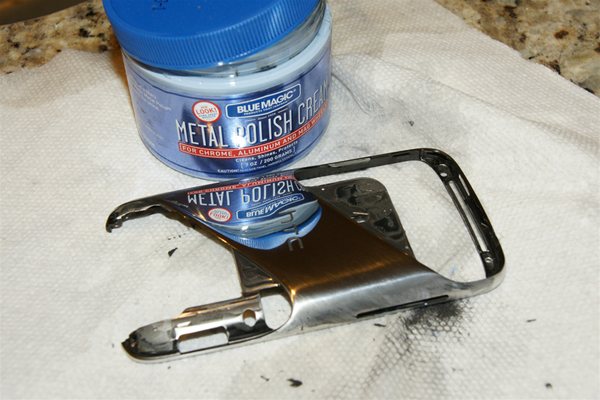
- Blue Magic Metal Polish Creme
- A few paper towels
If you want this project to go a little faster you could start out with a courser grit sand paper like 800 or 600. But be sure that you sand out those scratches with 1000 grit, else you will see the scratches after you are done with the polishing step.
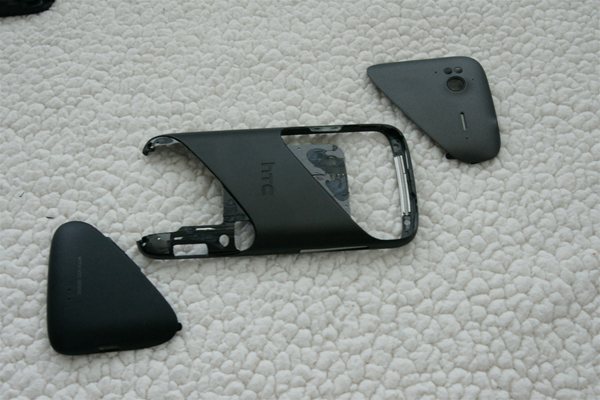
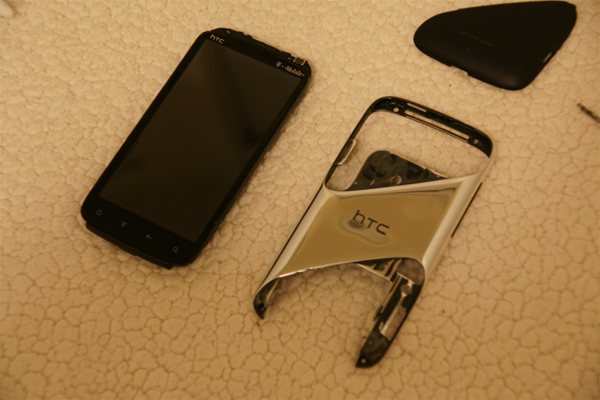
Step 1 Taking Apart your HTC Sensation 4G
Before you can polish your frame you need to remove the frame.
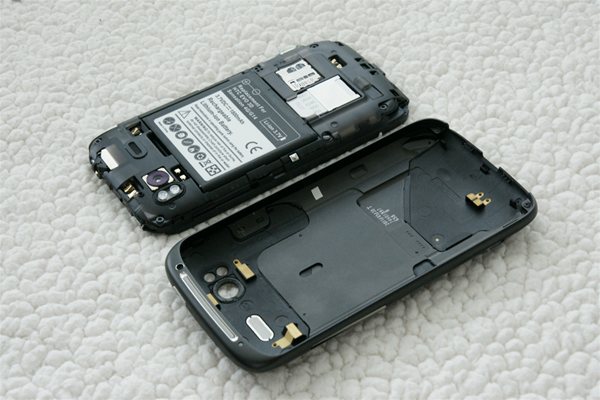
Next you need to remove the top and bottom plastic pieces. Its very important you don't try to polish these. Your antenna is built into these plastic pieces. So even though its tempting to polish these ( which would give you a glossy black finish, this would remove the protective rubberized coating that keeps your antenna safe. So be sure you remove these before starting. The bottom one has a couple screws that hold it in. Both pieces have glue that keep them attached. You will need to use a good amount of pressure to break this bond to free the pieces.
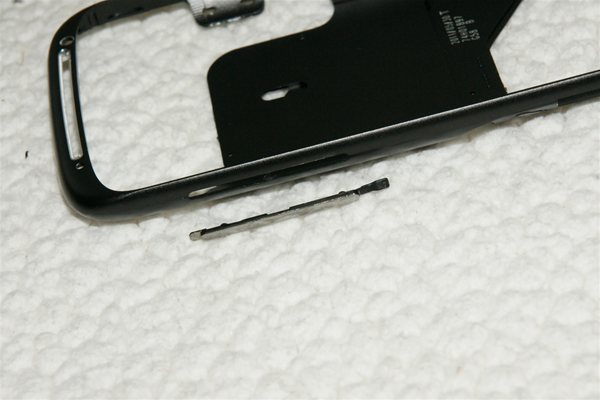
Next you need to remove the speaker grill, and light sensor lense. Just use a small flat blade screw driver to apply a little pressure from the front side and these should pop right out.

Next we need to remove the volume rocker. To remove this use a tiny flat blade screw driver to free the rubber part that is attached at the bottom.
Step 2 Sanding the Frame of your HTC Sensation 4G
Start off with your roughest grit sand paper, and start sanding. I highly recommend you start with a 600 or 800 grit. Or if you want to make sure it comes out perfect you can do what I did, and start with 1000 grit sand paper. DO NOT start with anything rougher than 600 grit. This will cause very deep scratches which are very difficult to remove later. You are better off taking your time and starting with a higher grit to ensure the best possible finish.
Take your sand paper and cut it into small strips. Then start sanding
Just to warn you the first stage in sanding will take a long time. After maybe 20 minutes it should start to look like this
You want to keep sanding until the bare metal is showing.
Here is mine a little later
Getting Closer
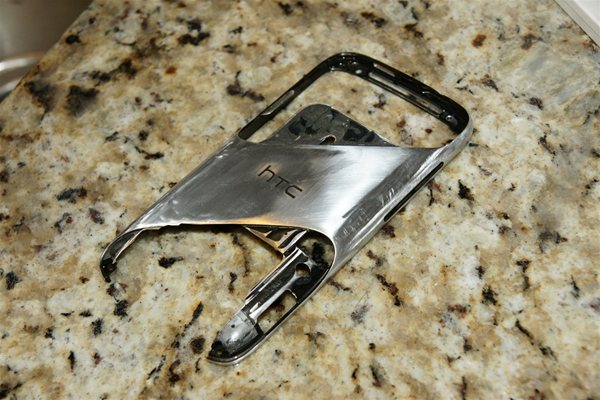
When you are finally done with the first sanding step you should not see any paint remaining on the parts of the phone that will be exposed.
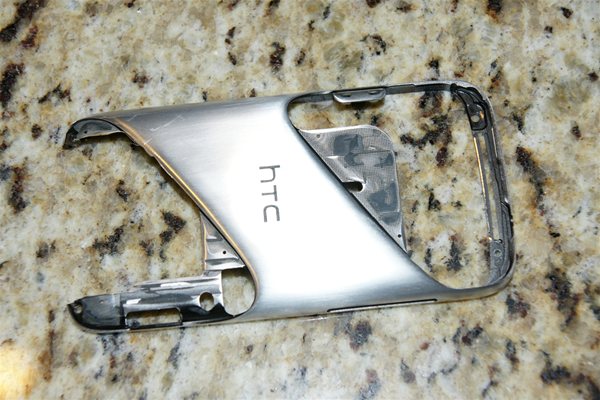
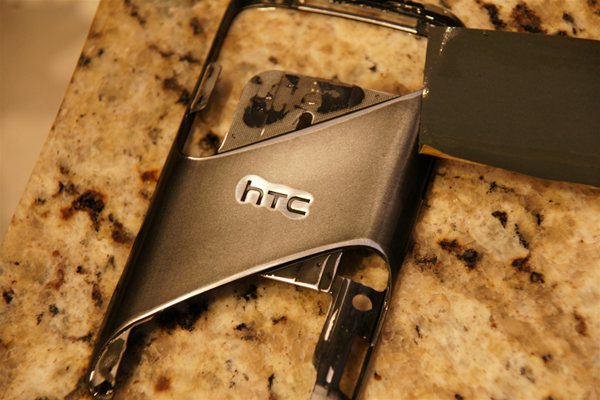
At this point, if you prefer the brushed metal look, then you could go ahead and put everything back together. Here are some pictures of what the phone looks like with the Brushed Metal Look
The next step would be to use the finer grit sand papers ( 1500 or greater ) to remove the scratches of your 1000 grit sand paper. Fortunately sanding out the 1000 grit scratches with 1500 grit doesn't take very long. I only used a single sheet of sand paper on this step. After you are done sanding its time to move on to the polishing step.
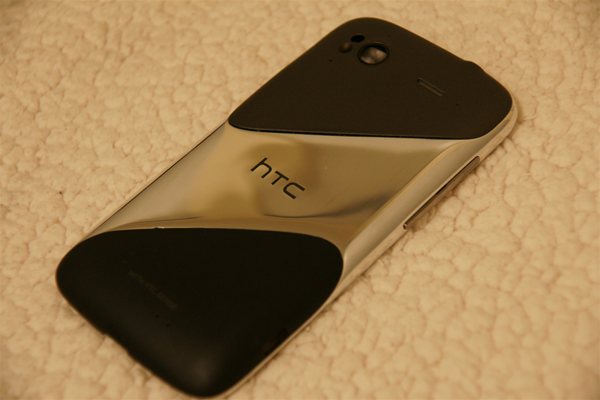
Step 3 Polishing your HTC Sensation 4G
In this step you will be using paper towels and the Metal Polish Creme. You want to fold the paper town up and then tape a very small dap of the Metal Polish Creme and buff it into your frame.
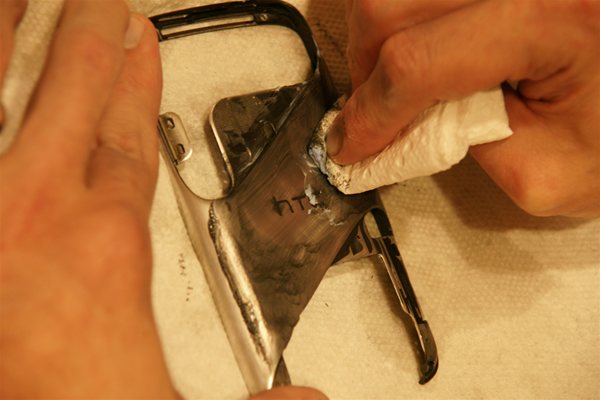
As you Polish your paper towel will turn black, rotate your paper towel to a clean spot and keep polishing. Then stop to inspect the shine
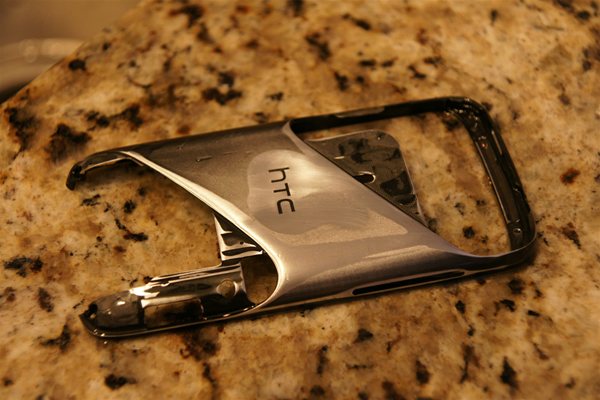
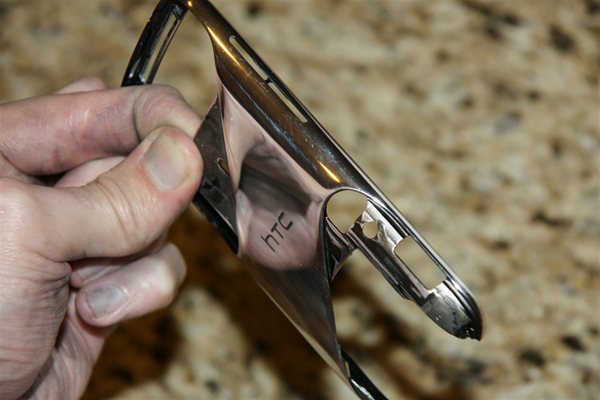
Make sure you don't see any deep scratches from a previous sanding step. If everything looks good keep polishing the entire frame until it has a chrome like mirror finish.
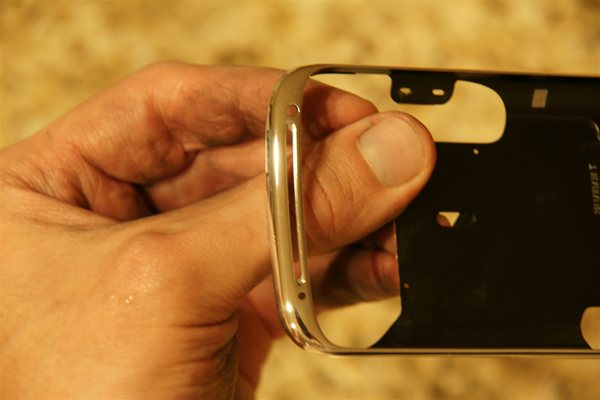
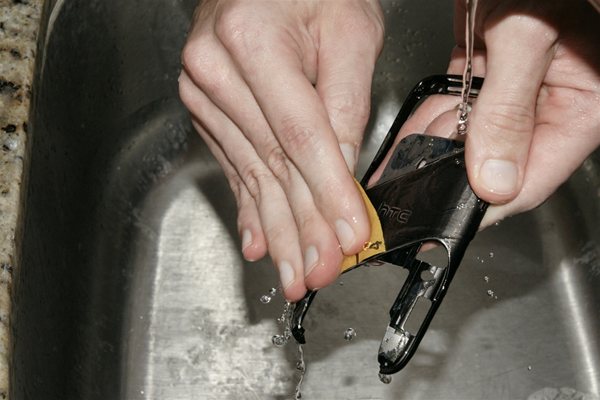
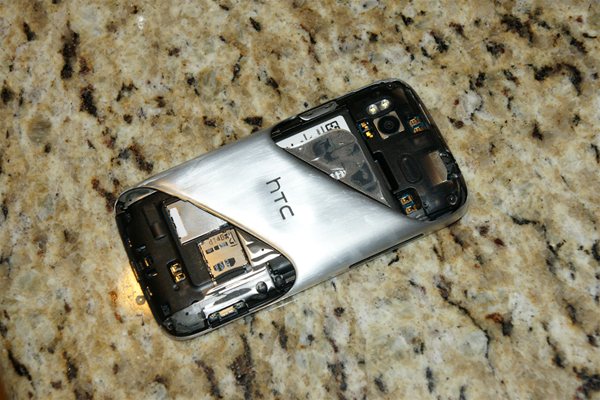
Now that your Frame is Polished reassemble the plastics, Some of the pieces you will need to use a very small dap of glue to reattach them.
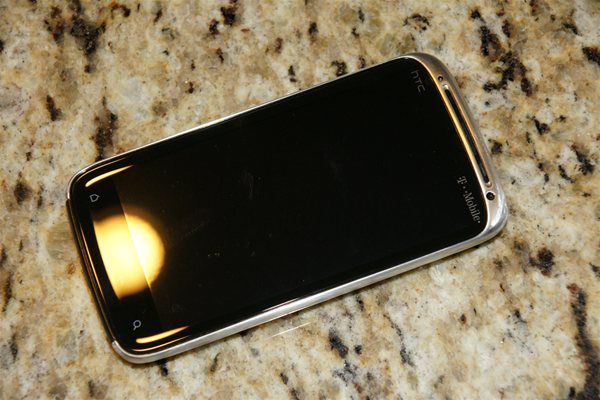
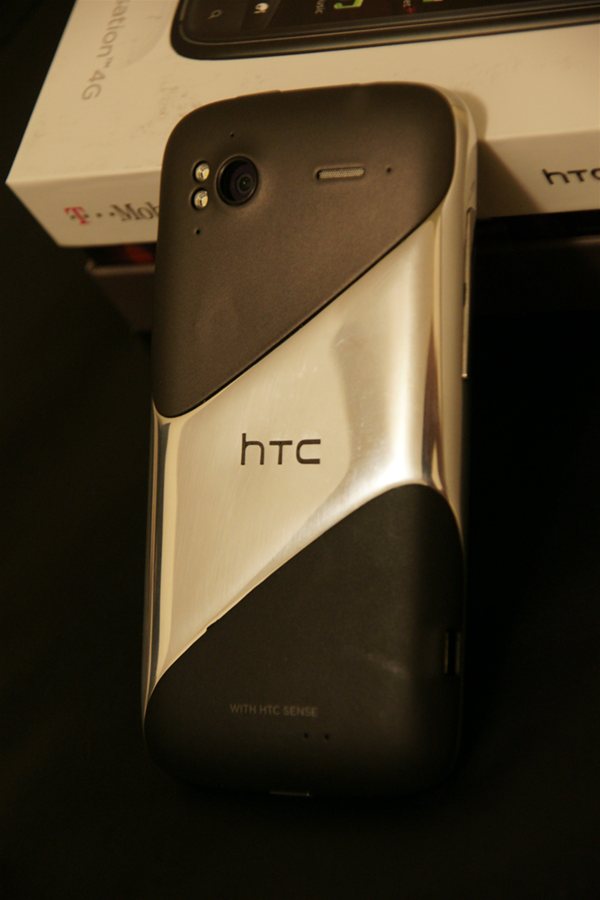
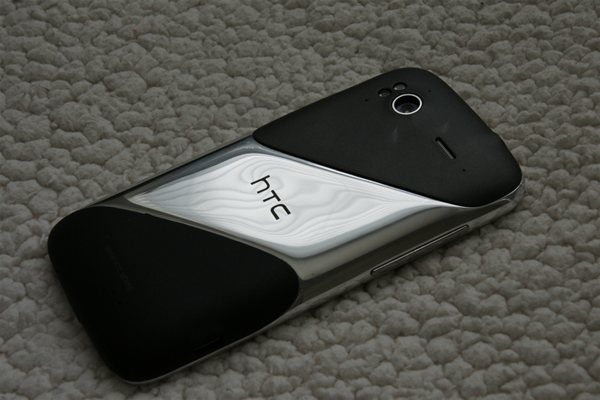
Final Product
HTC Sensation 4G with a Polished Frame

Update 7/26/2011
I have also polished the metal port for the camera opening. Very easy to do and looks great
Questions and Answers for Polishing your HTC Sensation 4G
After initially writing this article I had many people asking questions. I will attempt to answer most of these questions below
Where do I buy the Sand Paper and Polishing Creme?
The best place to find the materials would be an auto parts store. I personally bought mine from AutoZone, but any autoparts store should have the Sand Paper in this fine grit. Its normally used in auto body work. And no you won't find this stuff at Lowes or Home Depot.
This is taking forever can I use courser grit sand paper?
Sure, using courser grit sand paper in the beginning will help to speed up the process, but remember if you sand it with 400 grit sand paper, you will need to remove those scratches with 600 grit, then remove those scratches with 800 grit, then 1000 grit and so on. Once the initial pant is removed its very hard to tell if you are fully removed the scratches from the previous grit. You won't even realize how many deep scratches are left until you get to the polishing step, where you might see the mirror finish with some deep scratches that won't buff out. At this point you have to go back from the beginning and try to sand out those scratches. This can be very tedious, and disappointing. This is the reason I started with 1000 grit. It took forever, but then I was 100% that I wouldn't have any deep scratches in my finished product.
Is there a faster and easier way to remove the paint?
Possibly. Jimmah555 from XDA-Developers suggested that buying some Jasco Brand paint & epoxy stripper from Home Depot might work. He said its a gel-like paste. You leave it on for about 10 minutes, the the paint should just wipe off. Then you would be left with the bare metal surface, which should not even need sanding. Then if you wanted to speed up the buffing stage you could use a buffing wheel on a dremel along with the Blue Magic Metal Polish Creme. I haven't tried this myself, so use your own discretion.
Will the Aluminum Oxidize after being polished?
If you use the Blue Magic Metal Polishing Creme then no. Blue Magic will leave a layer of silicon on the surface that helps protect it. I personally know this works, as I also polished my
Sony Xperia X1i and
HTC HD2 using the Blue Magic, and I never had any problems with Oxidation for the 2+ years I had these devices. However any metal that is exposed and not polished with the Blue Magic will oxidize.
Can I use something other than Blue Magic for Polishing?
Sure, but in my experience the Blue Magic works the best. I tried a few other polishes at the autoparts store and they didn't give me the results I was looking for. Plus most other polishes don't leave a protective silicon layer to protect it. So Yes you can use something else, but don't expect the shine to last for as long.
What kind of Glue should I use to reattach the plastic panels?
I used locktite extreme all temperature glue, not for any particular reason other than it works on both metal and plastic, and I already had it from another unrelated project. You can buy this glue at Walmart for about $3 for a small tube.
The Plastic Panels are not coming off, any advice?
Yes try using some tiny flat blade screw drivers to help break the bond between the frame and the plastics. If you just pry the plastics off you are likely to bend them up, or even crack them. Just be patient on this step.
Can I also polish the plastic panels?
No, you should not polish the plastic panels. I know its tempting, as if you were to polish these panels, the result would be matching high gloss black panels. But....Your phone's Antenna which is a thin sheet of metal, lays on the outside of these panels. If you look at the surface in the right light you will see the slight bulge from this sheet of metal. If you sand away the rubberized coating you are likely to damage the antenna layer. One of the reasons the Sensation gets better reception than say an HD2 is because of this antenna design. I know they are kind of ugly, black and grey, but unfortunately there is nothing we can do about them.
Can you polish the metal ring around the camera lens?
Yes, check the updated pics above. Very easy to remove and polish this piece. Took me 10 minutes to do including cleanup.
145706 Visitors
145706 Views
 WhiteSites Blog


u r a genius man!! it looks awesome!!