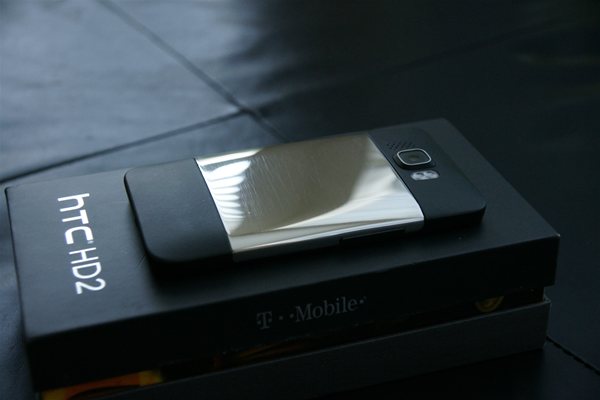
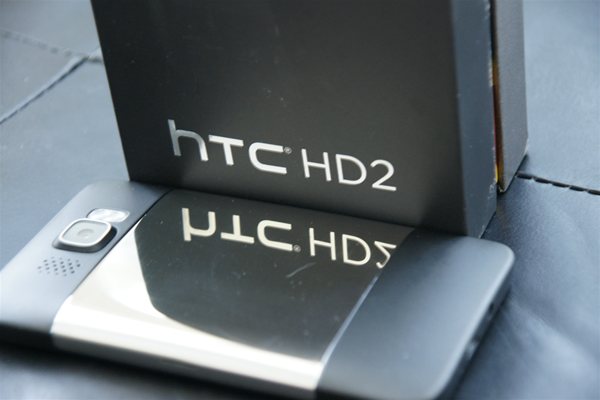
Chrome HTC HD2 Battery Cover Tutorial
Posted on May 26, 2010 by
Paul WhiteIn this tutorial I will take you step by step through the process required for polishing your
HTC HD2 battery cover into a perfect chrome mirrored finish.
Why Polish your HTC HD2 battery cover?
When the HD2 first came out it was only available in Europe and Asia. As such if you lived in the USA and wanted one you paid a small fortune to have it imported, then try to get it working on one of the USA GSM service
providers. Then finally some executive at T-Mobile had the sense to get the HD2 on the T-Mobile network. The HD2 is quickly becoming the IPhone for T-Mobile. Very popular and limited availability. So what is inevitable is eventually lots of people will have the
HTC HD2. As such any person who doesn't like to have the same phone as everyone else, is going to want to customize theirs to make it different. Sure you can cook up different ROMs for the unit and modify the UI, but the outer appearance is what will really make it stand out. The Battery cover on the HD2 is made of Metal, has a slight etched texture going the long ways, and then is painted to kind of match the rest of the phone ( which it does very poorly ). So in this tutorial I decided I wanted to polish my battery cover to a chrome Mirrored finish. When I use the word chrome I am talking about the look, and not actually chrome platting the battery cover.
Before we get started
In theory this would work with any battery cover that is made of metal, so even if your phone is not an
HTC HD2, you should still be able to use this tutorial to do your phone ( as long as the part you are polishing is made of metal ). Its also possible to do this with Plastic but you have to be very gentle, and the course grit sand paper most likely will not be needed. Also it is easiest to do this with surfaces that are flat. If you have some complex shape you want to polish I would not recommend doing this, unless you have a dremel tool and some polishing heads. Even then its no easy task.
Step 1 to a Chrome HTC HD2 - Preparation
Before you can get started you will need the following.
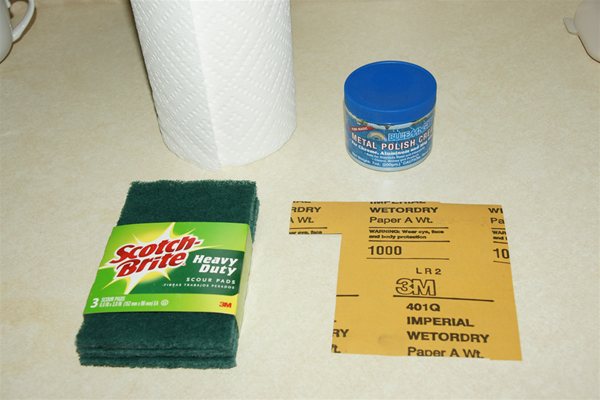
1. Roll of paper towels, or old cotton T-Shirts that you don't plan on wearing after this.
2. Green Scour Pads ( optional )
3. Course Sand Paper ( 300 Grit is best )
4. Fine Sand Paper ( 1000 Grit wet / dry )
5. Blue Coral Metal Polish Creme
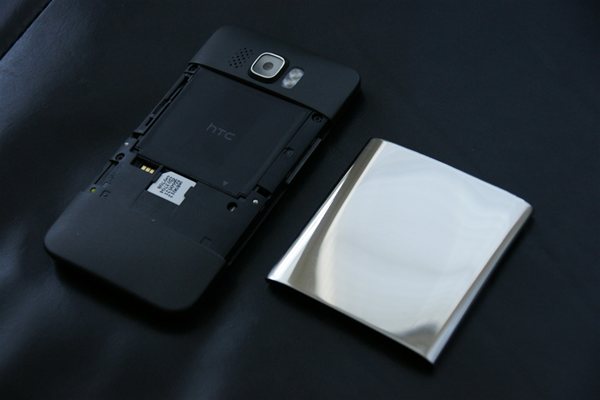
Step 2 to a Chrome HTC HD2 - Remove the Paint
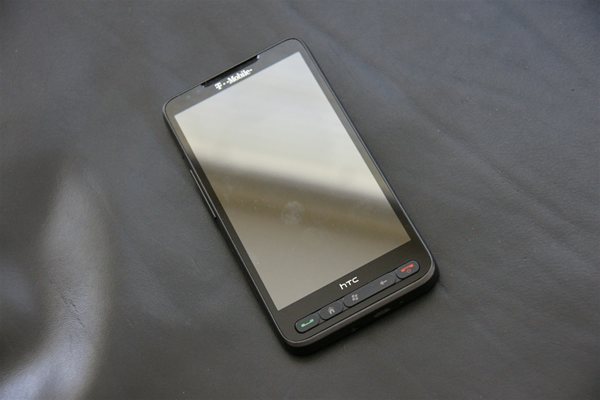
First, DO NOT attempt to polish your battery cover while on the phone. Remove your battery cover from the phone before starting. Something you should know ahead of time is the paint on the battery cover does not come off easily. I tried using the Green Scour Pad and after several minutes of scrubbing the progress was minimal. So I stepped up to a 220 Grit Sand Paper to remove the Paint. Since the battery cover has a natural texture that goes the long ways of the phone, its best to sand against this texture. Cut your Sand Paper into 2" x 2" squares. Hand Sand the surface until the Sand Paper has lost its integrity, then pick up a new piece and keep going. Continue to do this until no more black paint can be seen on the battery cover. Do not worry so much about which direction you sand just as long as you are able to remove all of the paint. You can use a courser grit of sand paper but you might have trouble removing these scratches later on. For this reason I recommend using a 300 Grit to start off.
Battery Cover with Most of the Paint Removed
Step 3 to a Chrome HTC HD2 - Sand with Course Grit Sand Paper
Now that all the paint is removed, Focus on the scratches the sand paper left on the surface. You goal is to make these scratches even. A good way to do this is to eliminate all the scratches that go in one direction. In my case I sanded with the Course Grit Sand paper in the vertical direction until all the horizontal scratches were gone. Make sure you do not leave any deep scratches before moving on to the next step. Else these scratches will be visible after you finish the final step and will look very bad. Also wet sanding tends to make it a little easier, so take your sanding activities to your kitchen sink.
Battery Cover with all Paint removed and sanding completed with Course Grit Sand Paper
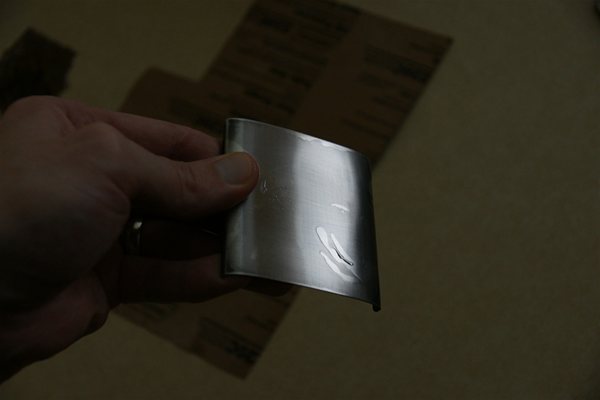
Step 4 to a Chrome HTC HD2 - Sand with Fine Grit Sand Paper
Now pick up the 1000 Grit Sand paper and cut it into small 2" by 2" squares. Once again our goal is to remove the scratches from the previous course grit sand paper. Sand in the opposite direction and keep sanding until you can no longer see the original scratches. Its a good idea to pick up the battery cover and tilt it in the light to make sure you have completely removed the unwanted scratches. This part may take some time, just be patient. When you are finished the surface should have a reflective quality to it, but will still be a little hazy.
After polishing with 1000 grit sand paper.
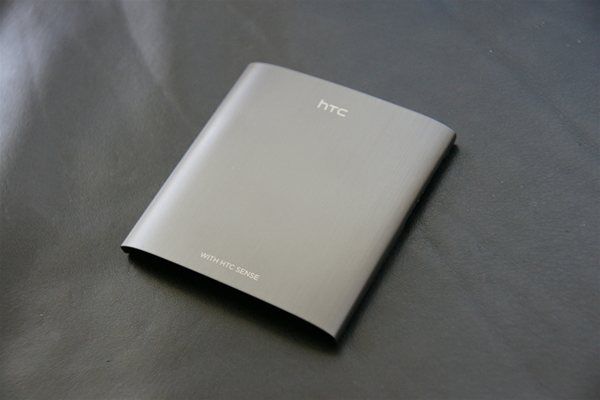
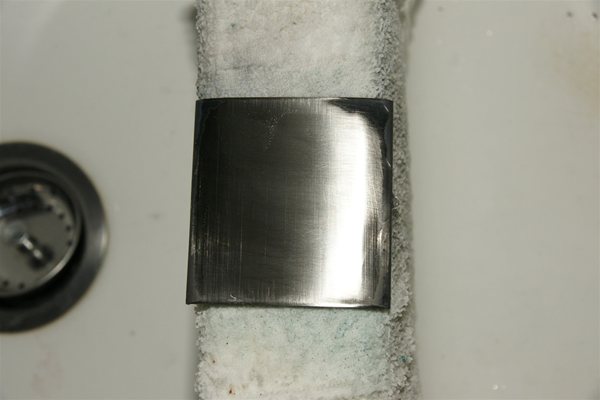
Step 5 to a Chrome HTC HD2 - Polish with Metal Polish Creme
The metal polish creme will bring your battery cover to a near perfect mirrored finish. After this step it will become very obvious if you sanded enough in the previous steps. To use the polish take a few drops and buff it into the battery cover using a paper towel.
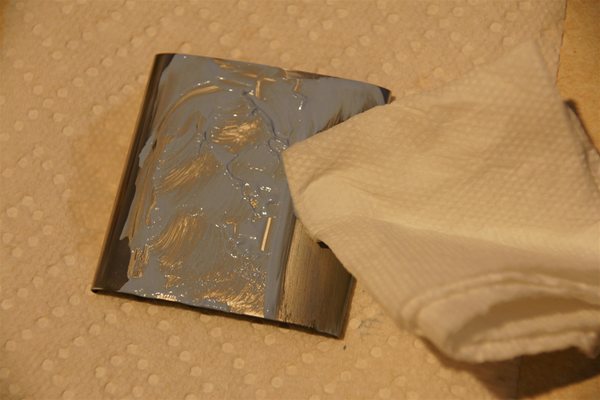
The paper towel will turn black as it removes a thin layer of metal from the surface.
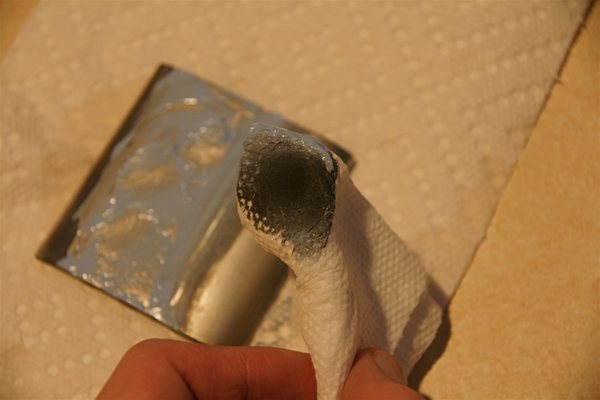
When it turns black rotate your towel to a clean side and keep going. Repeat over and over again until the surface is a perfect mirror. Keep in mind the polish creme will only remove fine scratches, If you find you still have deep scratches you will need to go back and do some more sanding.
Clean up
After you are done, use some soap and water to clean off the battery cover, and wash your hands, so you don't immediately leave finger prints all over your new shiny battery cover.
Finally admire your phone knowing your
HTC HD2 is not like all the others.
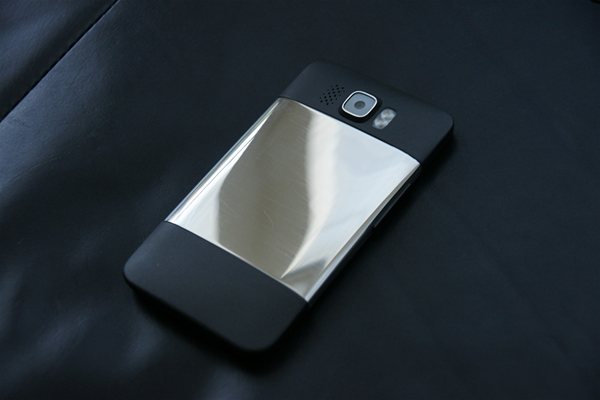
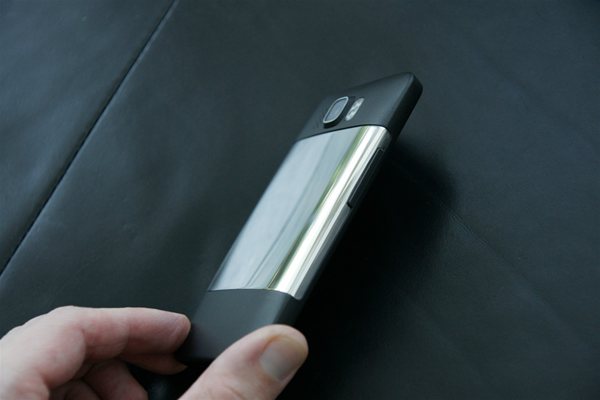

As you might notice in the pictures some of the deep scratches are visible depending on the angle, I may go back later and try to sand these scratches out. I hope everyone enjoyed this tutorial.
UPDATE 5/27/2010A few visitors suggested that taking more gradual steps in the sanding would improve the end result, and they are correct. Unfortunately I only had the 220 grit and 1000 grit sand paper on hand, so that Is what I used.
If you want absolute perfection you will need to use many different grits of sand paper, starting with a 300 or 400 grit, then using a 600, 800, 1000, 1200, and finally the Polishing creme. Also an electric belt sander might save your fingertips from the abuse, as well as save you an entire day of hand sanding. Still putting your own blood, tears, and sweat into a project like this has a certain level of satisfaction that is priceless.
Business Opportunity
I had some people offering to pay me to do this to their phone. I appreciate your positive thoughts. Unfortunately work keeps me a little too busy, to start my own production line of Battery Covers, That and to do it right I would have to invest in a good belt sander, and polishing wheel so I could ramp up production. After the initial investment in tools, and the labor costs I would have to sell these at a premium to make a return, and I not sure how many
HTC HD2 owners would be willing to pay for something like this. I feel that most people with Windows Phones tend to be a little more of the DO IT YOURSELF type. They would refuse to pay $100 for a battery cover, but would waste an entire week trying to do it themselves. So I figured a tutorial to help put people on the right track might be more beneficial to the community of HD2 Owners.
HD3 will be next
The HD3 will be my next phone, as long as it runs windows Mobile. If it has metal parts similar to other Smart Phones I will also be polishing this one. Next time I will make a video tutorial, and most likely use the right tools ( belt sander, polishing wheel ) to get the job done.
63164 Visitors
63164 Views
 WhiteSites Blog

loving it!!! can't wait to try it on mine as soon as i get it!!! many thanks!!!!